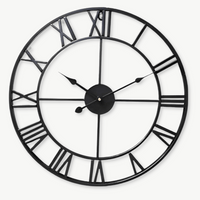

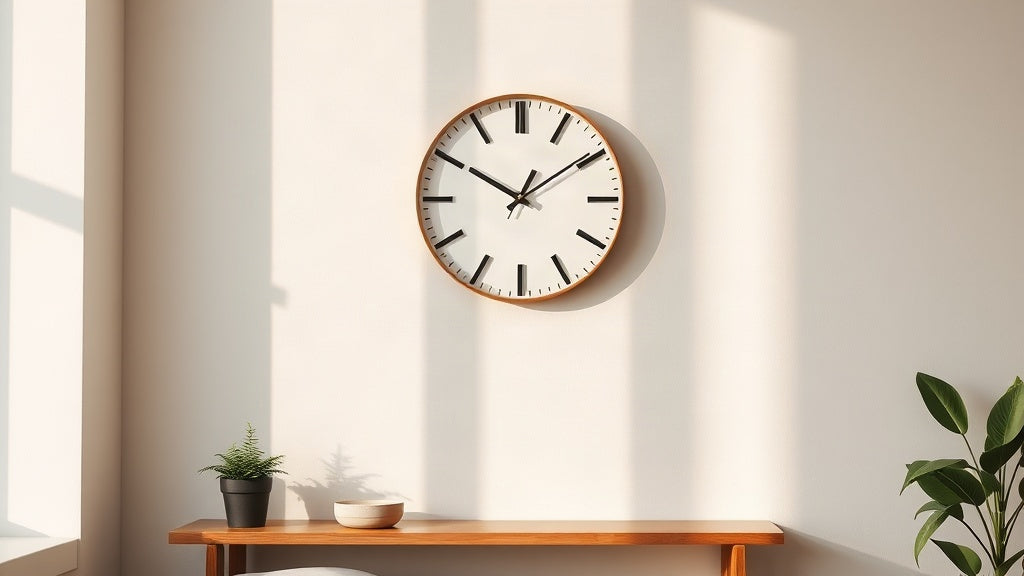
You've found the perfect clock. It's hanging in your cart, mentally it's already on your wall, and then the thought arrives: do I actually need to drill into this wall? If you're renting, living in a listed building, or simply allergic to the idea of pulling out a power tool on a Sunday afternoon, you're not alone. The good news is that hanging an easy to install wall clock no tools needed is completely achievable, and the results can look just as sharp as anything mounted with screws and rawlplugs.
This guide covers every reliable method for drill-free installation, which clock designs make the process genuinely painless, and what to watch out for so your new statement piece stays exactly where you put it. Whether you're eyeing a Scandinavian minimalist round or a frameless 3D design, there's a no-tools path that fits your wall and your style.
Key takeaways
- Command strips hold reliably up to 7.5 lbs (3.4 kg) on smooth, painted surfaces, covering most lightweight and mid-weight wall clocks.
- Clock weight and wall texture are the two variables that decide which no-drill method works best.
- Clocks with a single rear hanging hook are the easiest to mount without tools; clocks with D-rings or keyhole slots need a surface to catch on.
- Silent quartz movement matters twice as much when you're placing a clock in a bedroom or home office.
- For renters, adhesive solutions leave walls clean on removal, protecting your deposit.
Why No-Drill Installation Is Smarter Than It Sounds
The knee-jerk reaction to "no drilling" is that it's a compromise. That you're trading security for convenience. That's not quite right. A properly applied adhesive strip or adhesive hook carries real weight, keeps your walls intact, and in most cases is just as permanent as a nail for a clock that won't be moved often.
Renters have the most obvious reason to avoid drilling: most tenancy agreements require walls to be returned to their original condition. But homeowners skip the drill too, especially on tiled walls, plaster that's prone to crumbling, or surfaces where finding a stud would take longer than the entire installation. Sometimes the simple path is the right one.
There's also a styling argument. No-drill methods give you freedom to experiment. You can reposition a clock three times in a month without a trail of spackled holes marking your indecision. That kind of flexibility is actually useful when you're working out the right height, the right wall, or the right relationship between the clock and the furniture beneath it. Choosing an easy to install wall clock no tools needed isn't a consolation prize; it's often the smarter starting point.

The Four Methods That Actually Work for a No-Tools Wall Clock
1. Adhesive Command Strips (the go-to for most clocks)
Command strips, made by 3M and several other manufacturers, are the closest thing to a universal answer for lightweight to medium-weight clocks. The strips bond to smooth surfaces, painted drywall, wood paneling, and glass, and they're designed to release cleanly when you pull the tab straight down.
The critical number here is weight capacity per pair of strips. Standard large strips hold around 7.5 lbs (3.4 kg). Heavy-duty versions push up to 16 lbs (7.2 kg). Before buying anything, weigh your clock on kitchen scales. Then use at least 25% less than the maximum rated load to give yourself a real safety margin.
One nuance that most instructions skip: the surface needs to be fully dry and free of dust or residue. Wipe it with isopropyl alcohol, let it dry for 60 seconds, then apply. Pressing each strip firmly for 30 seconds makes a genuine difference to the final hold strength.
2. Adhesive Hooks (best for clocks with a hanging notch or loop)
Many clocks ship with a single metal hook or notch on the back. For these, a single adhesive hook on the wall is all you need. Adhesive hooks are rated by weight just like strips, so match the spec to your clock. The advantage over strips is the flexibility: the clock can be lifted on and off without removing the wall anchor, which is useful if you want to change the battery or clean the dial face.
For this method to work cleanly, the clock needs a centred rear hook. If yours has two D-rings or offset mounting points, strips are the more reliable route.
3. Picture Hanging Strips (for clocks with a flat back)
Some wall clocks, particularly flat-backed 3D and frameless designs, don't have a hook at all. They're meant to rest flush against the wall. Picture hanging strips work like a velcro-style pairing: one adhesive half on the clock, one on the wall. They interlock and hold the piece flat. The weight limits are comparable to standard command strips, so the same rules apply.
This method works beautifully for minimalist and Scandinavian-style clocks where you want zero visual gap between the clock and the wall surface. It's also the method that makes a easy to install wall clock no tools needed genuinely indistinguishable from a traditionally hung piece.
4. Freestanding and Shelf-Placed Clocks (when no hanging is the answer)
It's worth naming the option that sidesteps the whole question entirely. Clocks designed for shelves, mantels, or sideboards need no installation at all. A tabletop or shelf clock can anchor a vignette just as effectively as a wall-mounted piece, and moving it takes ten seconds. If your walls are genuinely off-limits or you want to style a bookcase, this is a legitimate and often underused choice.
Did you know?
3M introduced the original Command strip adhesive technology in 1992 after years of research into clean-removal adhesives for the medical industry. The same principle, a polymer that bonds firmly under pressure but releases by stretching rather than tearing, is now used in over 200 home organisation products. Today, the technology is trusted in hospitals, aircraft interiors, and yes, apartment walls across the world.
Matching Your Clock Weight to the Right Method
| Clock weight | Recommended method | Notes |
|---|---|---|
| Under 1 lb (450 g) | Single adhesive hook or 1 pair command strips | Most 12 in lightweight wooden or acrylic clocks fall here |
| 1-3 lbs (450 g - 1.4 kg) | 2-3 pairs large command strips or heavy-duty adhesive hook | Standard for 30-40 cm wood clocks, glass-face designs |
| 3-7 lbs (1.4-3.2 kg) | Heavy-duty strips (16 lb rated), multiple anchor points | Large 60 cm metal or composite clocks; test hold for 24 hrs before releasing |
| Over 7 lbs (3.2 kg) | Single screw into stud, or shelf/mantel placement | Adhesive alone is not reliable for heavy cast iron, large gear, or cuckoo clocks |

Which Clock Designs Are Truly Built for No-Tools Hanging
Not every beautiful clock is a candidate for adhesive installation. The design details matter more than people realise when it comes to how confidently you can hang something without hardware.
Lightweight wooden and bamboo clocks
These are the sweet spot. A 30-40 cm wooden clock typically weighs between 300 g and 700 g, well within the capacity of a pair of heavy-duty command strips. The natural material keeps the clock visually warm and the weight practical. Bamboo is even lighter than most hardwoods, which makes it ideal for renters who want a statement piece without the anchor-into-a-stud conversation.
Single rear hanging notches are common on this type of clock, which pairs perfectly with a single adhesive hook. One hook, one notch, done in under five minutes. If you want to explore the full range of lightweight options, the wooden wall clock collection is a good place to start.

Frameless 3D and acrylic clocks
Self-adhesive frameless clocks are explicitly designed for no-drill installation. Each individual number or marker sticks directly to the wall surface, and the movement mechanism attaches via a small adhesive pad or suction point at the centre. The result is a floating, sculptural look that genuinely couldn't be achieved with a traditional hanging method. These are popular in contemporary and minimalist interiors because the clock disappears into the wall, leaving only the hands and markers visible.
Small and medium silent quartz clocks
A silent wall clock with no-tool installation hits two renter pain points at once: no drilling and no ticking. Silent quartz (also called *sweep movement*) replaces the step-by-step mechanical tick with a continuous glide, which makes an enormous difference in a bedroom or home office where the clock is always in earshot. Most silent quartz clocks in the 30-40 cm range are light enough for adhesive methods.

Step-by-Step: Hanging a Clock with Adhesive Strips
Here's what works in practice, rather than in theory.
- Weigh the clock. Kitchen scales are accurate enough. Note the weight, then pick strips rated for at least 25% more.
- Clean the wall and the clock back. Isopropyl alcohol on a cloth, let both surfaces dry for 60 seconds. Grease, dust, or old paint residue all compromise adhesion.
- Mark your position. Hold the clock against the wall where you want it. Use a pencil to lightly mark the top centre. This is your reference point, not a permanent mark, so a single small dot works.
- Apply strips to the clock first. Press each strip firmly onto the back of the clock for 30 seconds. Position them symmetrically if using multiple pairs to distribute load evenly.
- Bond the wall side. Remove the backing from the wall-side adhesive, press the clock to the wall on your pencil mark, and hold firm pressure for 60 seconds.
- Wait before loading. This step is where most people rush. Leave the clock in place, with hands removed if possible, for a full hour before attaching the movement or adding batteries. The adhesive needs time to reach full bond strength.
Getting the Height Right Without Measuring Twice
Height is where most people second-guess themselves, and where the "hang it and see" approach with adhesive really pays off. The general rule in interior design is to centre a wall clock at approximately eye level, which in most homes falls between 57 and 60 inches (145-152 cm) from the floor. That's the same target height used for hanging art in galleries.
The exception is when a clock sits above furniture. Above a sofa or console table, aim for 6-8 inches (15-20 cm) of clear space between the top of the furniture and the bottom edge of the clock. This creates a visual relationship between the pieces without the clock feeling like it's resting on the furniture.
For a clock used as a focal point on an otherwise empty wall, centering it at true eye level and giving it at least 12 inches (30 cm) of clear space on either side lets the design breathe properly. A common mistake is crowding a clock into a corner where it competes with adjacent elements instead of anchoring the wall. With an easy to install wall clock no tools needed, you can actually test that breathing room before you commit, moving the clock two inches left or right until the proportions feel right.

Wall Surfaces and When Adhesive Has Its Limits
Adhesive strips work brilliantly on smooth, painted drywall. They also perform well on wood paneling, glass, tiles, and painted brick. Where they struggle: rough textured walls (deep orange-peel or sand texture), unpainted concrete, wallpaper with a fabric texture, and surfaces that haven't fully cured after painting, typically anything painted within the last 7 days.
If your wall falls into one of these categories, picture rail hooks are worth considering. Many older UK and European apartments have picture rails near the ceiling, and a hanging wire or cord from the rail can hold significant weight without touching the wall at all. It's the classic renter workaround, and it works with virtually any clock weight.
The other option that's genuinely underused: floating shelves. A shallow shelf at the right height lets you place a clock without any contact with the wall beyond the shelf's own anchors, which are usually two screws into studs or wall anchors. The clock itself stays completely freestanding. If you're curious about which clock styles work best on a shelf display, the full wall clock collection includes several designs that transition effortlessly between wall and shelf placement.
Choosing Between Silent Quartz and Standard Movement When You Can't Use a Drill
Here's a pairing that doesn't get discussed enough: the no-drill context and the silent movement question are often the same person's problem. If you're in a rental apartment, your bedroom walls are probably within earshot of where you sleep, and a clock with an audible tick is going to bother you far more than it would in a house where you have space to breathe.
Silent *sweep* quartz movements, standard in many modern wall clocks, move the second hand in a continuous rotation rather than a step. The acoustic difference is real. In a quiet bedroom at 2 a.m., a ticking clock registers as a persistent, low-grade noise that interferes with sleep for a significant portion of people. A silent wall clock eliminates that entirely.
If you're choosing a clock for your living room and noise isn't a concern, standard quartz is fine and usually slightly more affordable. But for a bedroom, home office, or reading nook, the silent movement is worth the extra few dollars without question.
"I didn't realise how much the ticking bothered me until I replaced it with a silent model. Now the only sound in the room at night is the rain."
Customer review, verified purchase
Five Clock Styles That Combine Easy Hanging with Strong Design
Not all easy-install clocks look like compromises. These styles hit the brief on both fronts.
- Scandinavian minimalist. Clean, round, often in white or natural birch or bamboo. Single rear hook. Usually under 500 g at 30 cm. The kind of clock that looks intentional without trying hard. Its pared-back aesthetic fits into almost any interior without competing with existing decor, and the low weight makes it a natural candidate for a single adhesive hook install.
- Japanese-style wood and acrylic. Typically 40 cm, with a flat or gently domed face. The combination of a light bamboo or wood frame with an acrylic or glass dial face gives a contemporary feel while keeping the weight manageable for adhesive hanging. The contrast between natural grain and sleek acrylic is especially striking in industrial-style or mixed-material interiors.
- Frameless 3D self-adhesive. No hanging hardware at all. Each component sticks to the wall independently. Maximum creative flexibility and a zero-weight-limit installation since nothing is suspended. These look particularly striking in minimalist and contemporary spaces where the wall itself becomes part of the composition.
- Boho and celestial wooden designs. Cut-out wooden faces with open designs weigh less than solid dials of the same diameter, which gives you more size options within the safe adhesive weight range. A 45 cm wooden clock with a cut-out celestial or botanical motif often weighs less than a solid 30 cm metal equivalent, so you get visual scale without the installation challenge.
- Contemporary glass-face clocks. The glass adds some weight but the frames on modern 30 cm glass-face clocks are typically aluminium or ABS plastic, keeping total weight in the 400-600 g range. The glass face reads as more premium than the price suggests, and the reflective quality works especially well in darker rooms where you want a clock that catches the light.
Silent Wall Clocks
Every clock in this category pairs a no-fuss installation footprint with the sweep movement that keeps bedrooms and offices genuinely quiet.
179 references
Browse the collection →When You're Ready to Commit: Making It a Permanent Feature
There's a version of this story that ends with a drill. Not because the adhesive failed, but because you loved the clock so much in that spot for six months that you decided it's staying forever. When that moment comes, transitioning from an adhesive hook to a single screw takes about four minutes and leaves one small hole rather than the cluster of holes that comes from indecisive drilling on day one.
For a clock that earns a permanent spot on your wall, a single screw into a wall stud is the most secure long-term option for anything up to about 10 lbs (4.5 kg). A stud finder costs around $15 and pays for itself the first time it saves you from drilling into a cable. For clocks under 3 lbs, a hollow wall anchor into drywall is perfectly adequate and requires only a small pilot hole.
The no-tools approach gets you started without stress and without risk to your walls or your deposit. The category of easy to install wall clock no tools needed has genuinely grown in design quality over the last few years. You're not choosing between beautiful and practical anymore. The best lightweight, adhesive-ready clocks, whether they're Scandinavian birch rounds, frameless 3D contemporaries, or boho celestial cut-outs, now look exactly as considered as anything requiring hardware. And they hang in the time it takes to make a cup of tea.
Frequently asked questions
How do you put a clock on the wall without drilling?+
The most reliable method is adhesive command strips rated for the clock's weight. Clean both surfaces with isopropyl alcohol, press the strips firmly for 30 seconds each, and wait one full hour before fully loading the clock. For clocks with a single rear hook, a heavy-duty adhesive hook works even more simply. For frameless 3D clocks, each individual element sticks directly to the wall with its own adhesive backing, so no hanging hardware is needed at all. Any of these approaches qualifies as a genuine easy to install wall clock no tools needed solution.
How do you install a wall clock without nails?+
Adhesive strips, adhesive hooks, and picture hanging strips all work without nails. The choice depends on your clock's back design: use a hook for clocks with a single hanging notch, strips for flat-backed clocks, and picture hanging strips for frameless designs. For very heavy clocks over 7 lbs, placing the clock on a floating shelf is the safest no-nail alternative.
What is the easiest way to hang a clock?+
For clocks with a rear hook or notch, a single adhesive hook on a smooth painted wall is genuinely the simplest method: one anchor point, no leveling needed, clean removal when required. The whole process takes under five minutes. Buy strips or hooks rated for at least 25% more than your clock's actual weight, and clean both surfaces before applying for the best bond.
What is a good wall clock that doesn't tick?+
Any clock with a silent quartz or sweep movement eliminates the tick-tock sound. The second hand moves in a continuous glide rather than a step-by-step motion. Look for the terms "silent movement," "sweep movement," or "non-ticking" in the product description. Most modern wooden and Scandinavian-style wall clocks now come with silent quartz as standard, especially those designed for bedrooms and home offices. Browse the silent wall clock collection to find options across all sizes and styles.
Do command strips work on textured walls?+
Command strips are specifically designed for smooth surfaces and don't reliably adhere to deeply textured or rough walls, including unpainted concrete, heavy sand texture, or fabric wallpaper. On light orange-peel texture, heavy-duty strips sometimes work but the hold is less predictable. For textured walls, a picture rail wire system (if available) or a floating shelf are more dependable no-drill alternatives.
Are no-drill wall clocks secure enough for long-term use?+
Yes, for clocks under 3 lbs (1.4 kg) on smooth painted walls, heavy-duty adhesive strips are genuinely reliable for months and years of use. The key variables are surface cleanliness at installation time, using strips rated well above the clock's actual weight, and waiting the full recommended bonding period (typically one hour) before placing any load on the adhesive. Many customers report adhesive-hung clocks staying perfectly in place for two or more years without any sign of movement. If you ever want to upgrade to a permanent fix, one screw into a stud takes four minutes and leaves a single small hole.