
How to Hang a Wall Clock: The Complete Step-by-Step Guide
Hanging a wall clock might look like a simple task, but if it’s not done correctly, it can lead to accidents, wall damage, or even damage to the clock itself. In this guide, we’ll cover why it’s important to hang a wall clock securely, the exact steps for a successful installation, and expert safety tips you should follow.
Mounting your wall clock properly is important for several reasons. First, an improperly hung clock can fall, causing injury or damage to your home. Second, poor installation can damage your wall, leading to costly repairs.
By choosing the right location for clock installation and using the proper tools and materials, you can ensure your clock stays securely in place for years. Following step-by-step instructions and observing safety precautions will give you peace of mind, knowing your clock is fixed firmly, looks great, and works perfectly — without any accidents or damage.

Here’s a quick overview of the key steps for hanging a wall clock successfully:
- Choose the right location: Consider visibility, room aesthetics, and wall type. Make sure it matches the size and weight of the clock.
- Gather the necessary tools and materials: You’ll likely need a drill, screws, wall anchors, a level, a pencil, a measuring tape, etc.
- Prepare the workspace: Clear the area for an easy and accurate installation. Mark the wall for the exact placement and decide on the hanging method.
- Hang the clock: Follow step-by-step instructions using proper tools and materials while observing safety precautions.
- Installation tips: Ensure the clock is level, the hooks or brackets are secure, and the hardware is the correct size. Consider using a template for precision and avoid undersized or oversized nails/screws.
- By following these steps, you can hang your wall clock securely and successfully.
Key tips for hanging a wall clock:
- Pick the ideal location based on visibility, aesthetics, and wall type.
- Have all tools ready — drill, screws, anchors, level, pencil, tape measure, etc.
- Clear and mark the wall before starting.
- Follow step-by-step instructions and use appropriate hardware.
- Ensure it’s level and that the mounting hardware can handle the clock’s weight.
- Test the clock after installation to make sure it works correctly.

II. Step 1 – Choose the Right Location for Your Wall Clock
Before you start, decide where your clock will go. Think about factors like wall type, visibility, and the overall look of the room. Choose a spot where the clock will be easy to see and reach. If you need wall clock décor ideas, check our article: Wall Clock Decor Ideas.
Factors to consider when choosing where to hang your wall clock:
- Visibility: The clock should be visible from anywhere in the room but not in a spot where it obstructs other elements.
- Room aesthetics: Match the placement to the style, color, and furniture in the space.
- Wall type: Brick, concrete, drywall, and wood each require different mounting methods and hardware.
- Clock size: Bigger clocks need more open wall space; smaller ones can fit tighter spots.
- Lighting: Avoid placing the clock in direct sunlight or overly dark areas.
By taking these factors into account, you’ll find the best place to install your wall clock so it’s easy to read, visually appealing, and securely mounted.

III. Step 2 – Gather the Tools and Materials You’ll Need
Before starting your wall clock installation, gather all necessary tools and materials so you won’t need to stop mid-project. You’ll typically need:
Essential tools for hanging a wall clock:
- Level – ensures your clock is perfectly straight.
- Power drill – for making holes for anchors or screws.
- Drill bits – sized for your anchors or screws.
- Screws – secure the clock’s mounting bracket to the wall.
- Hammer – for tapping in wall anchors.
- Wall anchors – hold screws securely in drywall or concrete.
- Painter’s tape – for marking placement without damaging the wall.
- Pencil – for marking drill points.
- Measuring tape – to space mounting points correctly.

Materials you may need:
- The wall clock – make sure it matches the size and style of the space.
- Mounting hardware – often included with the clock, or buy separately for better quality.
- Wall anchors – for drywall, plaster, or concrete walls.
- Screws – choose the right size for your hardware and wall type.
- Double-sided tape – can help hold the clock in place during installation.
- Putty – to keep anchors from slipping.

IV. Step 3 – Prepare the Area Before Hanging
Before you start drilling or attaching anything, it’s important to prepare your workspace. This step helps ensure a safe and accurate wall clock installation.
How to prepare your wall for clock mounting:
- Remove any furniture, frames, or décor near the installation spot.
- Clear enough space so you can work comfortably and safely.
- If you’re near an open window, close it to avoid wind interference.
- Keep children and pets away from the area to prevent accidents.
Once the space is ready, mark the wall to determine the exact placement of your wall clock.
Marking the wall:
- Measure the distance between the top of the clock and its hanging point.
- Mark this spot on the wall at eye level for optimal visibility.
- Use a level to make sure your mark is perfectly horizontal.
- Mark where the screws or wall anchors will go according to the clock’s mounting bracket.
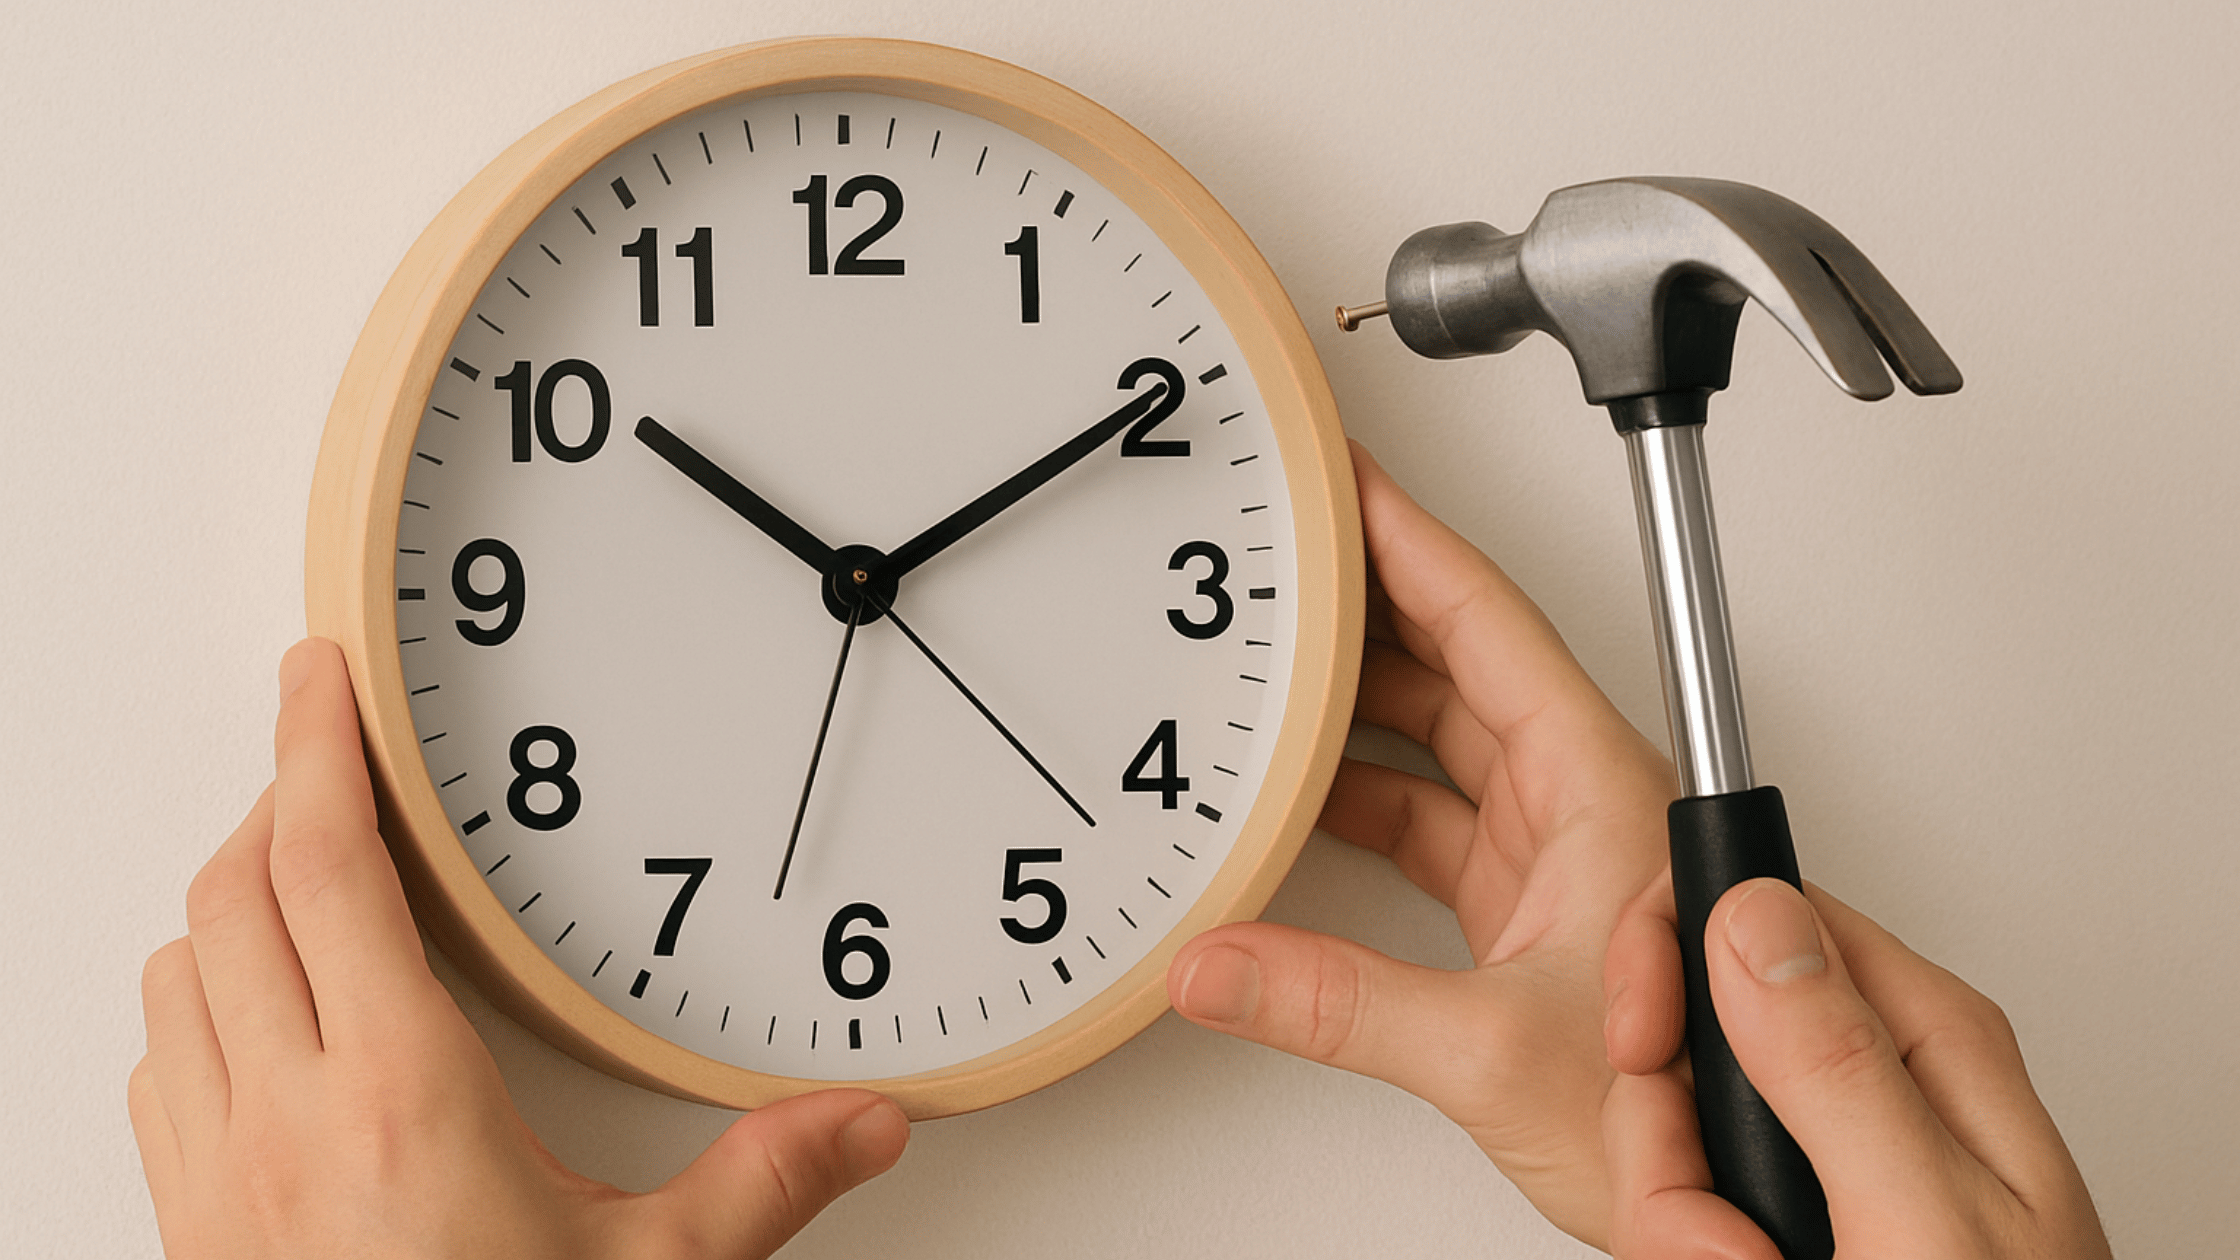
- Drill pilot holes or gently hammer nails/anchors into the marked points.

Choosing the right hanging hardware:
- Adhesive hooks: Easy to use, no drilling, but only for lightweight clocks.
- Screw-in anchors: Strong option for heavy clocks or brick/concrete walls.
- Expansion anchors: Great for plaster or drywall — they expand inside the wall for a firm hold.
- S-hooks: Simple, inexpensive, suitable for lighter clocks.
V. Step 4 – Hang the Wall Clock
Follow these steps to hang your wall clock securely:
- Gather all tools and hardware before starting.
- Decide on the best spot based on visibility, aesthetics, and wall type.
- Clear the area for safe movement and precision work.
- Mark the wall and double-check with a level.
- If using anchors or hooks, drill holes deep enough for the hardware.
- Insert anchors and screw in hooks or screws firmly.
- If using adhesive hooks, peel off the backing and press firmly against the wall.
- Mount the clock onto the hooks or screws according to the manufacturer’s instructions.
- Ensure the clock is level before letting go.
- Check the time function to confirm it’s working correctly.

Safety tips when hanging a wall clock:
- Use proper tools — drill, anchors, screws, and hardware suited for your clock’s weight.
- Wear gloves and safety glasses when drilling.
- Check that the clock is level to avoid future instability.
- Avoid placing heavy clocks over beds or couches to reduce injury risk if they fall.
- Follow the manufacturer’s instructions for your specific model.
- Do not overload the clock with extra weight or accessories.
- Avoid weak or unstable walls that can’t hold the clock’s weight.
VI. Step 5 – Tips for a Perfect Installation
To achieve a flawless wall clock installation, follow these additional expert tips:
- Use a level — place it on top of the clock frame to verify horizontal alignment.
- Adjust as needed until the clock is perfectly straight.
- Recheck after tightening screws to make sure it hasn’t shifted.

- Trace your clock’s outline onto paper and cut it out.
- Position the paper on the wall to visualize placement.
- Mark mounting points through the template.
- Remove the template and install hardware in the marked spots.
- Check manufacturer recommendations for screw size and type.
- Match anchors to wall type — plastic for drywall, metal for concrete.
- Use high-quality hardware to avoid loosening over time.

Once installed, check that the hands move freely, the time is accurate, and — if applicable — the pendulum swings properly. If adjustments are needed, follow the user manual.
VII. Conclusion
Hanging a wall clock is a simple project that can make a big impact on your home décor, but it requires proper preparation and execution for best results. By following the steps and safety guidelines above, you can install your clock securely, keeping it stylish and functional for years.
Quick Recap:
- Pick the best location for your clock.
- Gather all tools and materials.
- Prepare the area and mark the wall.
- Choose the right mounting method.
- Hang and level the clock.
- Test its functionality.
With the right installation technique, your clock will not only tell the time but also serve as a beautiful focal point in your room.

Explore our wall clocks collection for designs that suit every style and space.