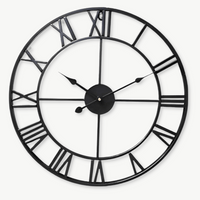


You've finally decided to swap out that old clock, or maybe you're redecorating entirely and the wall needs a clean slate. Either way, removing a wall clock without damaging the paint or plaster is one of those tasks that looks trivial right up until the moment it isn't. A pulled anchor, a flaked paint chip, or a sticky adhesive strip that takes half the wall with it, all entirely avoidable with the right approach.
Here's what actually works, broken down by clock type, wall type, and the small repairs that make the whole job look professional at the end. Whether you're dealing with a minimalist Scandinavian piece hung on a single hook or a chunky industrial metal dial anchored into drywall, the principles for how to remove a wall clock without damage are the same: know your mount, use the right technique, and take your time.
⭐ À retenir
- Always support the clock's weight before touching the mounting hardware.
- Adhesive strips must be pulled parallel to the wall, never straight out, or the paint comes with them.
- Identify your wall material (drywall, plaster, brick) before removing any anchor or screw.
- A faded shadow left behind is cosmetic, not structural, easy to fix with the right filler and paint.
- Give yourself 20-30 minutes and you'll finish with a wall that looks untouched.
What You're Actually Dealing With: 3 Common Mounting Types
There are three mounting types you'll encounter when taking down a wall clock: a single nail or screw hook, adhesive mounting strips, and a drilled anchor with screw. Identifying yours before you touch any tool is the single step that determines which technique protects your wall. Before you reach for any tool, spend thirty seconds figuring out how your clock is attached. The method that protects your wall depends entirely on this.
- Single nail or screw hook: The most common setup. A small nail or screw sits in the wall, and the clock's rear keyhole slot or hanging wire rests on it. Usually painless to remove.
- Adhesive mounting strips (Command-style): Popular in rentals and for lighter clocks. These are the trickiest, the removal technique matters more here than anywhere else.
- Drilled anchor with screw: Found on heavier or larger clocks. The screw goes into a plastic wall anchor (rawlplug), which expands inside the wall. Pulling it out carelessly causes crumbling drywall or chunks of plaster.
Some clocks combine types. A heavy industrial-style metal clock might use two anchored screws plus an adhesive foam pad on the back to stop wobble. Check both before you start pulling.

Tools Worth Having Before You Start
You don't need a full toolkit, a flathead screwdriver, needle-nose pliers, painter's tape, dental floss, lightweight spackle, and a fine sanding sponge cover every clock removal scenario you're likely to face. Nothing fancy is needed, but having these close by means you won't stop mid-job to hunt through a drawer. Think of it as mise en place for home repair.
- Flathead screwdriver (for prying adhesive strips and lifting anchors)
- Phillips screwdriver or small drill (for screwed mounts)
- Painter's tape (blue, low-tack, never masking tape on painted walls)
- Dental floss or a thin plastic card (for adhesive strip removal)
- Needle-nose pliers (for stubborn anchors)
- Lightweight spackle or polyfilla
- Fine-grit sanding sponge (220 grit)
- Touch-up paint if you have it
💡 Le savais-tu ?
Command strips were first introduced in 1992 and use a proprietary stretch-release adhesive technology. The adhesive is designed to bond strongly under load but release cleanly when stretched slowly at a very low angle, typically around 15 degrees from the wall surface. That angle is the entire secret. Most people pull straight out, which is exactly what causes paint damage.
Removing a Clock on a Single Nail or Screw Hook
Lift the clock straight up and off the hook rather than pulling it outward, then extract the nail with a side-to-side wiggle using needle-nose pliers, this keeps the entry point clean and leaves only a pin-sized mark that spackle fixes in minutes. This is the easiest scenario. Lift the clock up and off the hook. Don't pull the clock outward; just slide it upward until the keyhole slot clears the nail head. If the wire feels caught, support the clock with one hand and use your other to guide the wire free.
Once the clock is off, you'll see the nail or screw sitting in the wall. For a nail, grip it near the wall surface with needle-nose pliers and wiggle it side to side while pulling gently. Pulling straight out on a small nail can leave a ragged hole; the side-to-side motion keeps the entry point clean. For a screw, simply back it out with the matching screwdriver.
The resulting hole is almost always a pin-sized mark. A dab of spackle pressed in with a fingertip, smoothed flat, left to dry for an hour, then sanded lightly with a fine sponge. That's all it takes.
How to Remove Adhesive Mounting Strips Without Pulling the Paint Off
To remove adhesive mounting strips without pulling paint, warm the strip with a hairdryer for 20-30 seconds, separate the clock body first with dental floss, then stretch the pull tab slowly downward at a 15-degree angle, almost parallel to the wall, at roughly 1 cm per second. This is where most wall damage actually happens, and it's almost always down to technique rather than the adhesive quality itself. The fix is straightforward once you know it. Sound familiar? It should, this is the core of how to remove a wall clock without damage when adhesive mounting is involved.
Step 1, Warm the adhesive slightly
Hold a hairdryer on low heat about 10 cm from the strips for 20-30 seconds. Warmer adhesive stretches more cleanly. Don't overdo it; you're softening, not melting.
Step 2, Separate the clock from the wall first
Slide a thin plastic card or a piece of dental floss behind the clock body (not the strip itself) to break the seal between the clock's back and the wall. Work slowly. Once the clock's back is free, you can see and access the strips directly.
Step 3, Pull the tab at 15 degrees, slowly
Grip the pull tab at the bottom of each strip. Hold the wall firmly with your other hand, pressed flat, not pulling back. Stretch the strip downward and outward at a very low angle (almost parallel to the wall surface), moving at roughly 1 cm per second. You'll feel and hear a slight peeling sound. If resistance builds suddenly, stop, re-warm, and continue. Never jerk.
Step 4, Remove any residue
If a sticky film remains on the wall, dampen a cloth with a small amount of rubbing alcohol and blot, don't scrub. On painted walls, test a hidden corner first. For wallpaper, skip alcohol entirely and use a barely damp cloth only.

Getting Out a Wall Anchor Without Crumbling the Drywall
For standard drywall, push the anchor through into the cavity behind using a screwdriver and a light hammer tap, this keeps the hole clean and avoids the crumbling that happens when you try to yank an anchor straight out. This is the step that causes the most anxiety, and reasonably so. A plastic expansion anchor that's been in drywall for years can feel almost fused to the wall. Here's a method that works reliably on standard 12.5 mm drywall and on lime plaster.
Option A, Push it through (recommended for drywall)
Use a screwdriver or a spare screw slightly smaller than the anchor's outer diameter. Place the tip inside the anchor's opening and tap gently with a hammer until the anchor pushes through the drywall into the cavity behind it. The hole stays clean. You lose the anchor but save the wall surface. Fill with spackle afterward.
Option B, Back it out slowly
Re-insert the original screw about halfway into the anchor. Grip the screw head with pliers and work it side to side in a small rocking motion while pulling outward. The friction of the half-inserted screw gives you enough purchase to extract the anchor without crumbling the surrounding drywall. Work slowly; 30 seconds is faster than patching a 3 cm crater.
Option C, For solid walls (brick, concrete, stone)
Masonry anchors don't push through anywhere. For these, your best approach is usually to drive the anchor fully flush with the wall surface, fill over it with exterior-grade filler, and paint. Trying to extract a rawlplug from solid brick almost always damages more surface than it saves.
| Wall / Mount Type | Best Removal Method | Repair Needed |
|---|---|---|
| Drywall + nail | Side-to-side wiggle with pliers | Pin fill + sand |
| Drywall + plastic anchor | Push through or rock-and-pull | Spackle + sand + paint |
| Adhesive strips on painted wall | Warm + low-angle stretch pull | Residue wipe only (usually) |
| Plaster + screw | Back out with matching screwdriver | Lime filler + sand |
| Brick / masonry anchor | Drive flush, fill over | Exterior filler + paint |
Fixing the Wall After: From Pin Hole to Faded Shadow
Most wall repairs after removing a clock fall into three categories: a small pin or screw hole fixed with spackle and a light sand, a larger anchor hole that needs a two-stage fill, and a faded ghost shadow that only fresh touch-up paint can eliminate. The clock is off. Now you're looking at whatever it left behind. Here's how to handle the three scenarios you'll actually encounter.
Small pin hole or screw hole (up to 5 mm)
Press a pea-sized amount of lightweight spackle into the hole using a fingertip or a tiny putty knife. Smooth it level with the wall surface; slightly proud is fine because it shrinks a little as it dries. Wait one hour minimum. Sand lightly with a 220-grit sponge using a circular motion. If the spot is visible after drying, apply a second thin coat. Touch up with paint using a small foam roller rather than a brush; rollers match the existing texture far better than brushwork does.
Larger anchor hole (5-20 mm)
Use a two-stage approach: fill flush, let dry fully (overnight for deeper fills), sand, apply a skim coat, sand again. For holes larger than about 15 mm on drywall, a mesh repair patch stuck over the hole before filling gives the spackle something to grip and prevents cracking.
The faded shadow or ghost mark
Clocks block UV light and airborne dust for years. When you remove one, the wall behind it is noticeably cleaner and lighter than the surrounding area. This isn't damage, it's just differential aging. A light sanding won't fix it. The only real solution is touching up with the original paint color. If you don't have leftover paint, take a small chip to a hardware store for color matching; most do this for free. Apply two thin coats with a foam roller, feathering the edges outward beyond the ghost area.
⚠️ Attention
On walls painted with oil-based paint (common in homes built before the 1990s), standard water-based spackle may not adhere well and can crack over time. If you notice the wall has a slightly glossy finish, use an oil-based filler instead, or apply a bonding primer over the repair area before topping with spackle.

When the Clock Is Worth Repairing, Not Replacing
A dead quartz movement is rarely a reason to discard a clock you love, the mechanism slides out via a central front nut, a replacement costs a few dollars, and the whole swap takes about 15 minutes with no special tools. Sometimes the whole reason you're taking a clock down is that it stopped working, not that you're bored of it. A dead quartz movement is almost never a reason to throw away a clock you love. The mechanism itself (the small plastic motor unit and the hands) can be replaced for a few dollars, and the job takes about 15 minutes once the clock is off the wall.
The movement is held by a central nut on the front face of the clock. Unscrew it counter-clockwise, and the entire mechanism slides out from the back. Note the shaft length before ordering a replacement (it needs to match your clock's dial thickness). New movements come pre-fitted; you just slide the hands back on in order: hour hand first, then minute hand, then second hand if present. Set the time, hang it back up.
For clocks with visible gears or decorative mechanisms, the movement is usually modular and even more accessible to replace, since the decorative elements are separate from the motor unit.


Protecting Your Wall When Hanging the Next Clock
Set the next clock up with future removal in mind: a hardened steel picture hook for light pieces, a toggle anchor rather than a standard plastic anchor for medium-weight ones, and a strip of blue painter's tape at the drill point to catch dust and prevent surface chipping. Since you've just done the work of removing one clock cleanly, it's worth taking five extra minutes to set the next one up in a way that makes future removal equally painless. Think of it as returning the favour to your future self.
- For lightweight clocks (under 1 kg): A single picture hook with a hardened steel pin causes the smallest possible wall entry and holds reliably up to about 5 kg.
- For medium clocks (1-3 kg): One screw into a wall stud is the cleanest option. If a stud isn't where you need it, use a proper toggle anchor rather than a standard plastic anchor. Toggle anchors distribute load across a larger area of drywall and pull out far more cleanly.
- For very heavy or large statement clocks: Two anchor points spaced apart are always safer than one central point, both for load distribution and for keeping the clock level over time.
- Put a strip of blue painter's tape on the wall at your chosen hanging point before drilling. It catches dust, makes pencil marks easier to see, and slightly reduces the risk of surface paint chipping when the drill bit bites in.
"The best time to think about removal is when you're hanging something, not when you're taking it down."
A principle that applies to wall art, shelving, and clocks especially.

Choosing What Goes on the Wall Next: Making It Intentional
Before committing to the same spot, think through reading distance, acoustic environment, wall structure, and the direction of natural light, these four factors together determine whether a replacement wall clock will actually work in that space. There's something unexpectedly liberating about a bare patch of wall. Most of the time, a clock ends up in a spot because that's where the previous owner put one. With your wall freshly repaired and your options open, it's worth asking whether the next clock goes in the same spot, or whether a different wall, height, or room makes more sense.
A few things worth thinking through before committing:
- Reading distance: For a hallway or kitchen, clocks are glanced at from across the room. Larger faces (30 cm and up) read instantly at 4-5 metres without squinting at numerals.
- Acoustic environment: Bedrooms and home offices are where a ticking mechanism becomes noticeable at night. Silent quartz wall clocks use a sweep second hand rather than a stepping motor, no tick, same accuracy.
- Weight and wall structure: A beautiful large metal clock in a room with only drywall and no accessible studs means you'll need proper toggle anchors rated for its weight. Check the product specs before you buy.
- Light and shadow: Clocks with raised numerals or 3D elements look flat in low-light corners. They work best on walls that receive some natural or directional artificial light during the hours you use that room most.
If you're browsing for something to replace the clock you just took down, the full wall clock collection covers everything from slim Scandinavian minimalist pieces to chunky industrial metal dials, filtered by size, style, and room. Narrowing by room type is genuinely useful if you're not sure what scale makes sense for the space.
Quick Recap: How to Remove a Wall Clock Without Damage
You've now got everything you need to do this cleanly. Here's the short version to pin in your memory before you start: identify the mount type, support the clock's weight before touching any hardware, use the side-to-side wiggle for nails, the 15-degree slow-pull for adhesive strips, and the push-through or rock-and-extract method for plastic anchors. Patch with spackle, sand smooth, touch up paint if there's a ghost shadow. That's how to remove a wall clock without damage in full, start to finish, with a wall that looks like nothing was ever there.
The whole job, including a neat patch and a tidy cleanup, fits comfortably inside 30 minutes if you're not rushing. And the next clock you hang? Set it up right from the start, so future-you has an equally easy time of it.
FAQ
What is the safest way to remove a wall clock without damaging the paint?+
The safest method depends on how the clock is mounted. For nail or screw hooks, lift the clock straight up off the hook and then extract the nail with side-to-side wiggle using pliers. For adhesive strips, warm the strip slightly with a hairdryer, then stretch the pull tab slowly at a 15-degree angle to the wall, almost parallel to the surface. Never pull straight outward. For drilled plastic anchors in drywall, use a screwdriver to push the anchor through the board into the cavity behind, rather than pulling it out. In every case, supporting the clock's weight before touching the hardware prevents accidental leverage marks on the wall.
How do I get the back off a clock to access the movement?+
Most wall clock movements are accessed from the front, not the back. Look for the central nut on the clock face that holds the hand shaft, unscrew it counter-clockwise and the movement will slide free from behind the dial. On some frame-style clocks, the back panel is held by small clips or screws around the perimeter; press or unscrew these and lift the panel away. If the clock has a sealed casing, check for a small recessed slot on the edge that accepts a flathead screwdriver.
Can you move clock hands backwards when resetting the time?+
On most quartz clocks, you should avoid moving the hands counter-clockwise (backwards). The gear train inside a standard quartz movement is designed to run in one direction only, and forcing the hands backward can strip the plastic gears or bend the hand connection pin. The correct approach is always to advance the hands forward, going the long way around if needed. Some higher-end mechanical movements do allow backward setting, but check your specific clock's documentation before trying.
How do I remove clock hands without bending them?+
Work from the outermost hand inward: second hand first (if present), then minute hand, then hour hand. For the second hand, grip it close to the center arbor and pull straight outward; it's friction-fit and comes off cleanly with steady, even pressure. For the minute and hour hands, which are often set on a tapered arbor, use a hand puller tool if you have one, or place two small pieces of card either side of the hand close to the hub to distribute the lifting force. Never use pliers directly on the hand surface; the soft metal bends instantly.
My adhesive strip left a residue on the wall. What removes it safely?+
Rubbing alcohol (isopropyl, 70%) on a soft cloth works well on most painted surfaces; blot rather than scrub. For wallpaper, avoid solvents entirely and try a barely damp cloth with mild dish soap. If the residue has been on the wall for a long time and has hardened, a small amount of cooking oil left on for a few minutes can soften it before wiping. Always test any solution on an inconspicuous area first, especially on older or flat-finish paint which is more susceptible to surface lifting.
Is it possible to clean a clock movement without fully disassembling it?+
For quartz movements, cleaning without disassembly isn't particularly useful; the gears are sealed in a plastic housing and don't need lubrication or dust removal during normal operation. If the clock is running slow or the second hand is stuttering, the movement itself is usually worn out rather than dirty, and replacement is more cost-effective than cleaning. For older mechanical or pendulum clock movements, compressed air can remove surface dust from accessible gears, but a proper service (oiling, depthing adjustment) requires disassembly and is best done by a clock repairer.